
Link to Project That Led To This Tutorial
1. Acquire Necessary Equipment
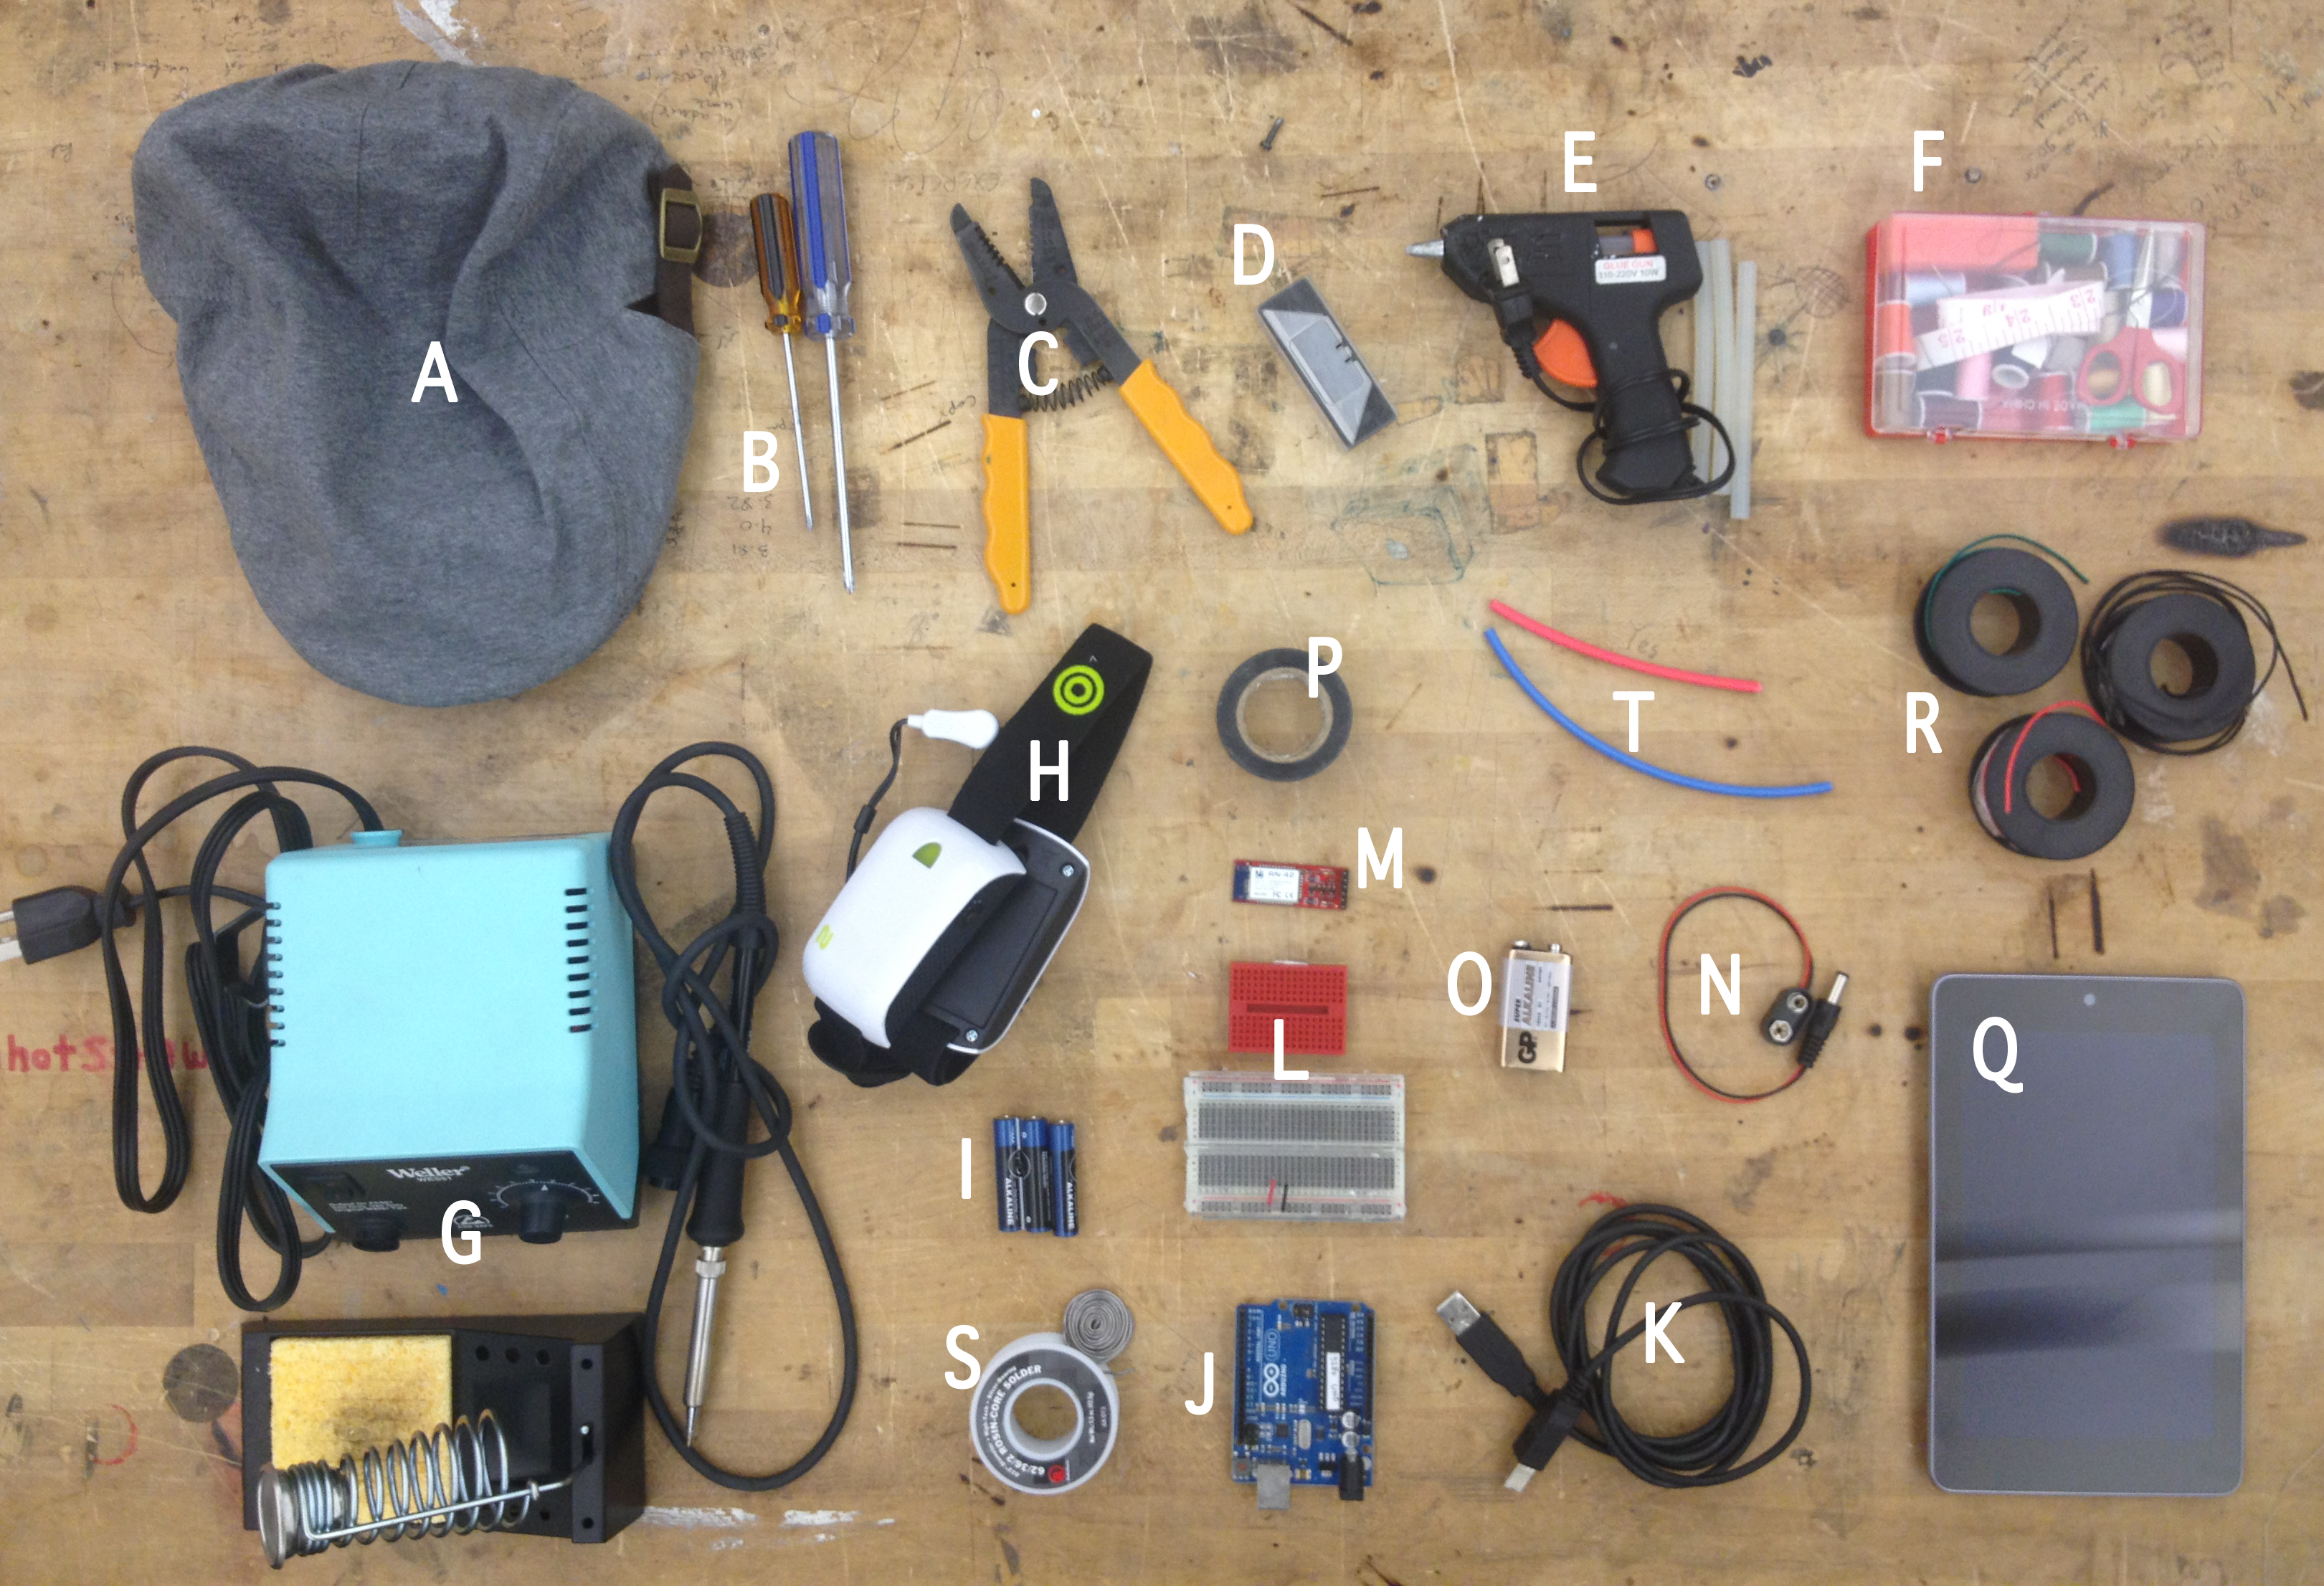
Parts List (Refer to image below)
a. Hat that you intend to mount EEG system onto
b. Screwdriver(s)
c. Wire-cutters
d. Razor blades
e. Glue gun and glue
f. Sewing kit
g. Soldering Iron and mount
h. Mattel Mindflex (w/ Neurosky TGAM EEG-processing chip)
i. x3 AAA batteries to power Mindflex
j. Ardiuno / Arduino Micro
k. USB 2.0 Cable (if using standard Arduino) / USB Micro (if using Arduino Micro)
l. Mini breadboard(s)
m. Bluetooth Mate Silver (or similar product)
n. 9v battery power adapter to power Arduino externally
o. 9v Battery
p. Electric Tape
q. Android Device
r. Electrical Wire (2 or 3 different colors)
s. Solder
t. Heat shrink
2. Gut Your Mindflex
2.1) Using your screwdriver, unscrew the L and R encasements of the Mindflex, as well the AAA battery pack cover.
[PICTURE]
2.2) Cut the rear elastic strap of the Mindflex (the strap that goes around the back of your head when wearing it)
[PICTURE]
2.3) Use wire-cutters to remove the white encasements from the internal circuitry of the device. You can dispose of the metal stabilizing rods holding the straps in the encasements. BE CAREFUL not to cut any wires!
[PICTURE]
2.4) Using your screwdriver, remove the screws holding the Thinkgear PCB in its encasement. Remove the encasement.
[PICTURE]
2.5) Carefully, use wire-cutters to remove excess plastic from the AAA battery. I suggest leaving just enough to allow for the battery pack cover to still be screwed into place.
[PICTURE]
2.6)VERY CAREFULLY use a razor blade to remove the elastic fabric from the sensor and wiring in the front strap of the Mindflex. Make sure not to sever any of the wires or pull them from the PCB or else you will have to do some tricky re-soldering.
[PICTURE]
2.7) This step is optional, but you can remove the LED from the back of the Neurosky PCB. This may save your system some power in the long run, but I kind of like it there because it indicates that the system is powered and on.
[PICTURE]
2.8) Your Mindflex system should now look something like this:
[PICTURE]
3. Set Up Arduino to BT System
3.1) First you will need to tap into the serial connection of the Mindflex. For this part of the process, follow the the step-by-step directions described in detail by the Frontiennerds’ hack, “How to Hack Toy EEGs.” Jump right to “2. The T Pin” and “3. Common Ground.” I’ve copied the sections of the hack that are relevant below:


3.2) …
… To Be Continued …
